Loading...
Loading...
Loading...
Loading...
Loading...
Loading...
Loading...
Loading...
Loading...
Loading...
Loading...
Loading...
Loading...
Loading...
Loading...
Loading...
Loading...
Each Release has the Features in the Release the CloudFormation Script to use with the Marketplace AMI.
Navigate to the Release of your FinOps Center
(We recommend that you keep instances with previous AMI until the upgraded installation is confirmed to be working properly. If recovery is required - you can restart the EC2 instance with the prior AMI which will update the CDK bucket with that version. Follow below instruction.)
Marketplace customers will receive an email that their is a new version of the FinOps Center AMI available. The AMI will be available in their EC2 Console for launch leveraging the same IAM Profile used during initial installation. The launched instance will update the FinOps Center cdk bucket with the updates. Select the FinOpsCenterStack.template.json and update the CloudFormation Stack with the object URL.
Click to Zoom
Click to Zoom
Validate the Parameters and advance through the next few screens and hit update.
Upon Completions, Code is Updated.
The Amazon Q in QuickSight FinOps Center Framework uses the same Deployment Model as FinOps Center via the Marketplace - AMI with CloudFormation.
Once the Offering is added to your AWS Accounts you will have an AMI that needs to be launch with the IAM Profile that was used for the Product Installation.
The Solution code will be deployed via 2 CloudFormation Scripts.
The First CFT builds and deploys the backend that will extract data from your FinOps Center application's DyanamoDB tables and pushes them to S3 that are created. Glue Crawlers then create the schema to be leverage for the 2nd CFT.
Note: Prior to proceeding to the 2nd CFT Script the Glue Crawlers must successfully complete and the new S3 buckets (amazonqframework-finopscenterqdataextractionbucket & amazonqframework-finopscenterqperiodbucketb17f0b5d-) must be shared with QuickSight.
The 2nd CFT will install the Athena Queries, QuickSight Datasets, QuickSight Topics, and other configurations. For the Installation, you need the Author Pro ID that was created to provide as a parameter for the Template to complete.
The CFT will take about 3 minutes to Run but the deployment will still be running. Allow for 15 mins before returning to the Back to QuickSight Console. In Console, navigate to the Groups Tag in Management to add the Author Pro User to the Topics-Admin Group.
Navigate to the Author Pro's Console and monitor the Topics being built. Note that Topics are built once the SPICE for the Dataset has successfully been Refreshed. Depending on the amount of data in your CUR2 or Application, this can take up to 30mins. As Topics appear they will be automatically added to the application by Role. As a best practices, run an invalidation in CloudFront upon completetion of all Topics being created.
FinOps Center Enterprise (Annual or Monthly)
FinOps-In-a-Box (Annual or Monthly)
FinOps-in-a-Box (Hourly)
FinOps Center Enterprise
FinOps Center FinOps-in-a-Box
FinOps Center FinOps-in-a-Box Hourly
Functional:
Release 25.2.0 is primarily around the inclusion of the Amazon Q in QuickSight Framework with UI Updates and Changes the CUDOS Framework embedding from Anonymous to User-Based.
FinOps Center creates IAM Roles and Policies. The Engineer deploying must have Administrative Privileges. (DO NOT INSTALL USING ROOT USER)
Upon Selecting Next you will be taken to the YAML form to complete the FinOps Center Installation.
Name Stack: No Requirements
Environment Parameter:
Bucket of CUR
Path to CUR Date - name/name/name/
Athena DB Created by CUDOS Framework
CUDOS will create cid_cur name
Table name based on CUR creation naming
Provide S3 Bucket for Frontend Application Install
Organization Roles
Define your Organization Role Names
Create your First Admin User and Email

Release 25.6.0
Updated Admin Screens for Financial Admins for Account Allocation
Update Month Close to run Final Cards based on seeing Invoice Number to Run Final Cards vs Manual Running Cards once Invoice is Recieved
Updated Budget Screen for all Users
Adding Resource Launch Date to Resource Table to assist with Workload Allocation
This is the initial Release of Amazon Q in QuickSight FinOps Center Framework
Topics Created
AWS Product
AWS Portfolio
AWS Department
AWS Business Unit
AWS Spending
AWS Vendor
DataSet Created
FinOps_Center_E1
FinOps_Center_E2
FinOps_Center_E3
FinOps_Center_E4
Once the AMI is launched and the code is deployed to your cdk bucket, you navigate back to the Configure Screen to install the CloudFormation Templates.
The First CFT to launch is the Amazon Q in QuickSight FinOps Center Backend Framework.
Continue to Launch Stack
Prior to Launch the 2nd Stack -> navigate to Glue and Validate that the Crawlers have run successfully.
Launch the 2nd Stack - Amazon Q in QuickSight FinOps Center Q Topics
On the 2nd Screen after launching you need to add the Author Pro that you setups within your QuickSight Environment
The installation of the scripts will take approximately 10 mins but the Lambda function that create the Athena Queries/Views, QuickSight Datasets, SPICE loading, and Topics can take upto 30 minutes.
Amazon Q in QuickSight Backend Framework
Amazon Q in QuickSight Topics Components
Enterprise
FinOps-In-a-Box
Hourly
FinOps Center is major Update with new User Experience and the integration of Cost Optimization Hub Approval Process.
While the prior UI was simplier that the AWS Console, we thought we could do better and are very happy to launch the New UI in 25.8.0.
The New U1 continues to have both Light and Dark Mode.
Another Major enhancement is the Process that leverages AWS Cost Optimization Hub Data Exports.
Workload Resource Start Date
To assist users identify Workload Resource for Claiming for Workload and/or specialized MAP Workload, Resources will have Start Date. Note: this capability will identify Resource Start date from Day 2 or FinOps Center installation.
Resource View
finopscenter_period


Bucket to CUR - cid-(CUSTOMERDELEGATEDADMINACCOUNT)-data-exports
Path to CUR Date - cur2/CustomerManagementAccount/cid-cur2/data
Athena DB Name - cid_data_export
Athena Table Name - cur2
Athena DataCalog - AwsDataCatalog
Athena WorkGroup - primary
Roles aligned to Busienss Requirements
Enviornment Parameters
Static Website - S3 Bucket Name Created for Frontend Bucket
From CloudFront - Distribution Name
Create your First Admin User and Email
Cost Optimization Hub
Bucket to CUR - cid-(CUSTOMERDELEGATEDADMINACCOUNT)-data-exports
Path - coh/(CustomerManagementAccount)`/cid-coh/data/

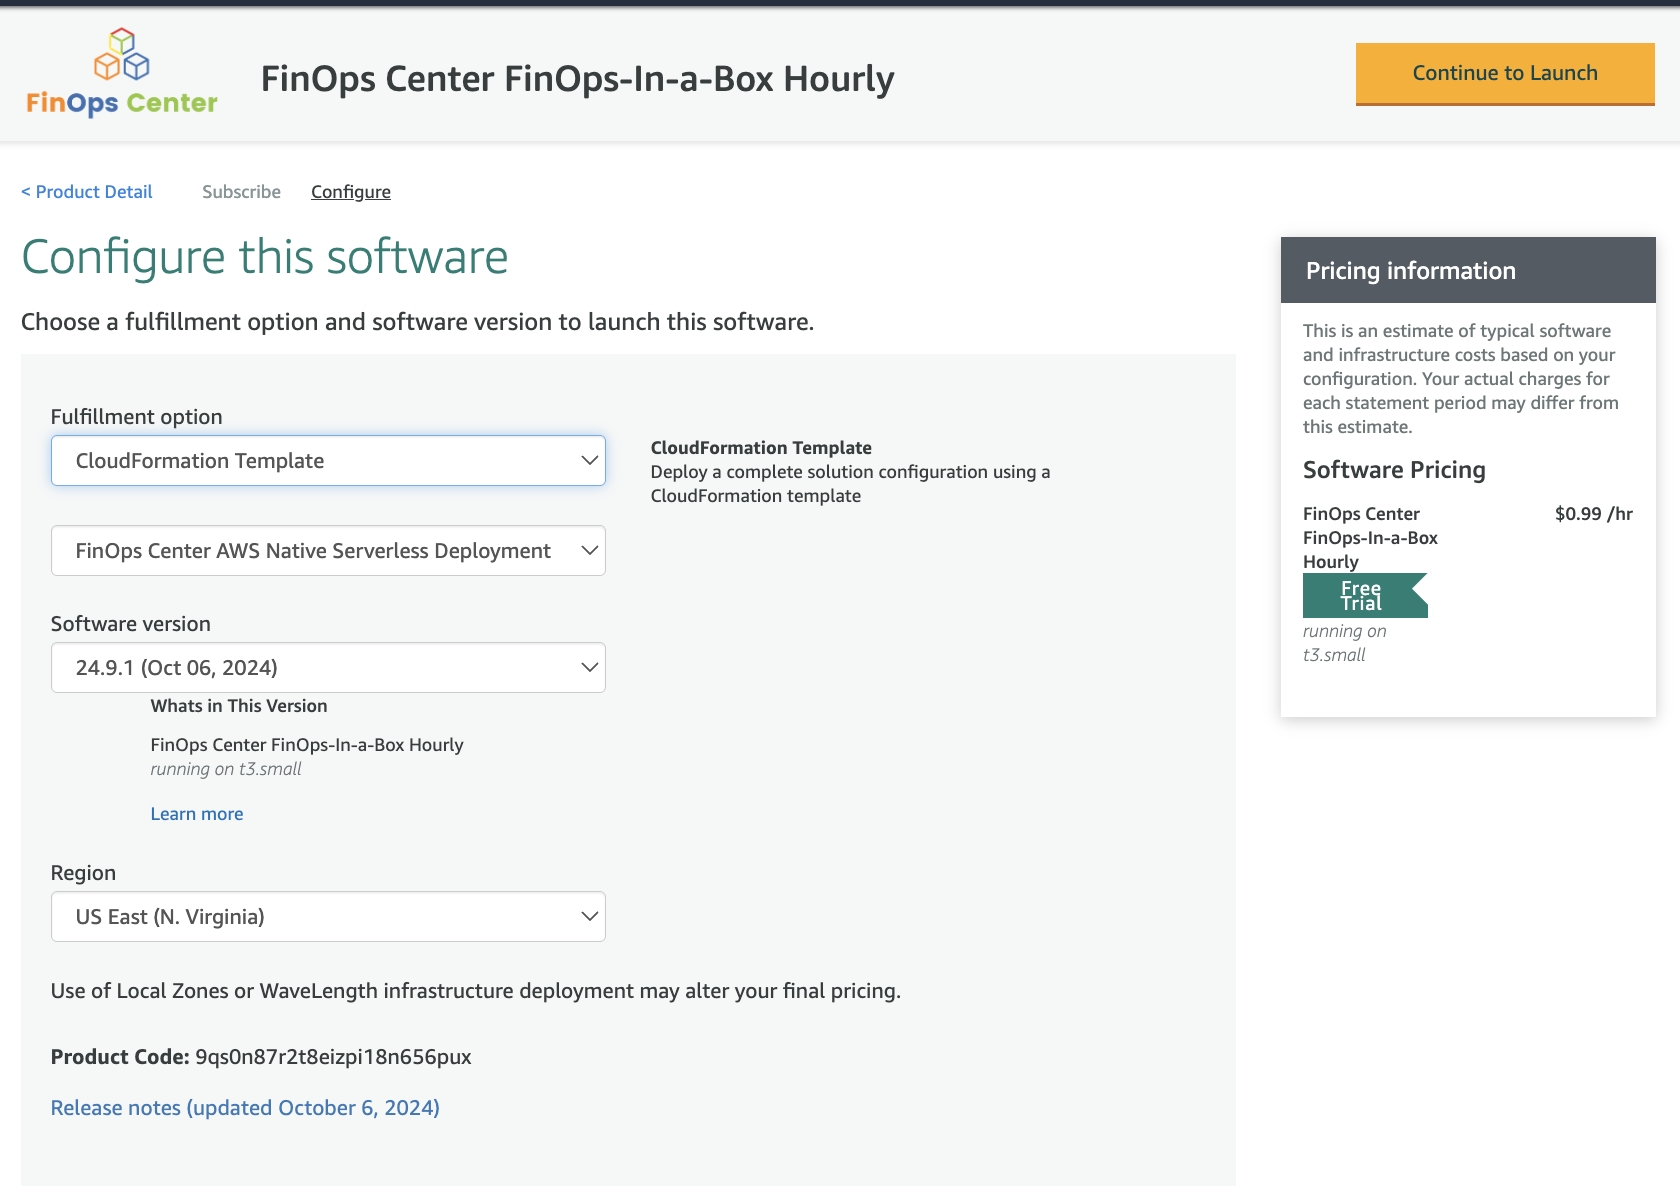
Upon complete the configuration to your AWS Environment (QuickSight) you will navigate to the Amazon Q in QuickSight Marketplace offering and subscribe to the services
Upon Subscribing the page, will refresh to add the AMI
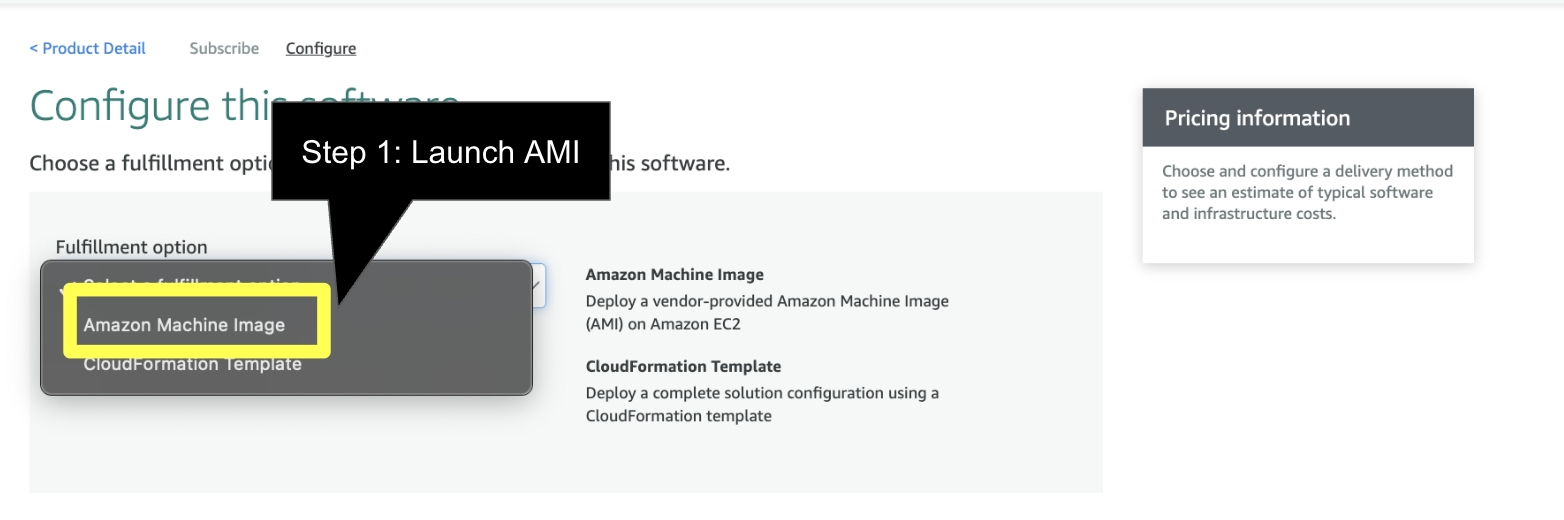
Click the Continue to Configuration and Select the AMI
Select your Version and Region and select Continue to Launch
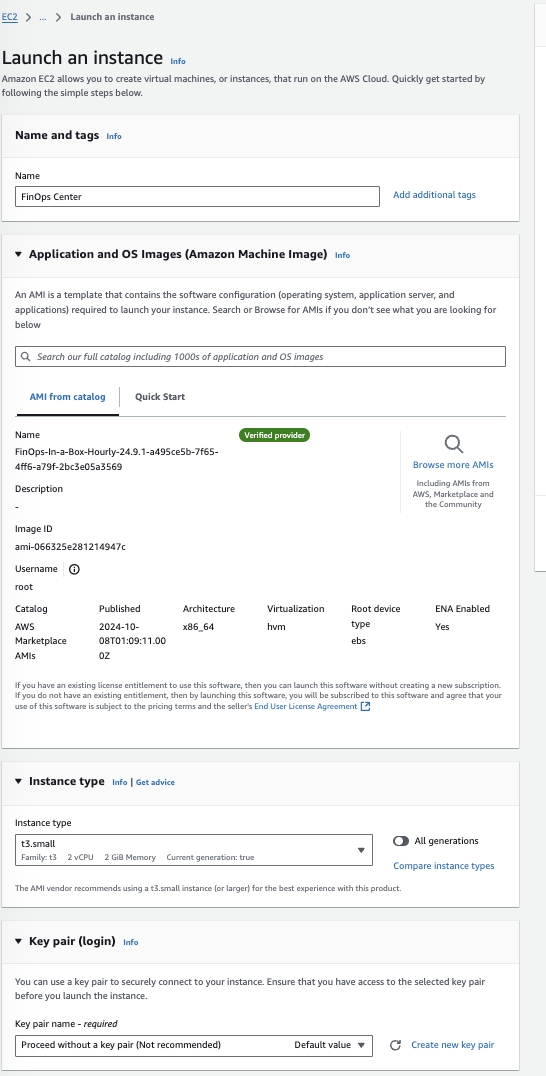
Launch via EC2
Add the name of the Instance, Select no Keypair
Add the Launch Profile from the FinOps Center Installation and Launch Instance


Launch through EC2
Click to Zoom
Click to Zoom
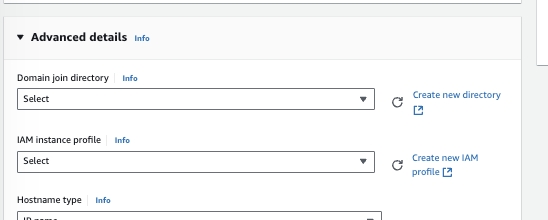
Configure Instance to your companies standards. As note previously, the EC2 instanced provisioned is used to copy files to S3 for the FinOps Center deployment. We recommend a small instance (T3 Small) be used and can be shut down once the files are copied to S3.
Click to Zoom
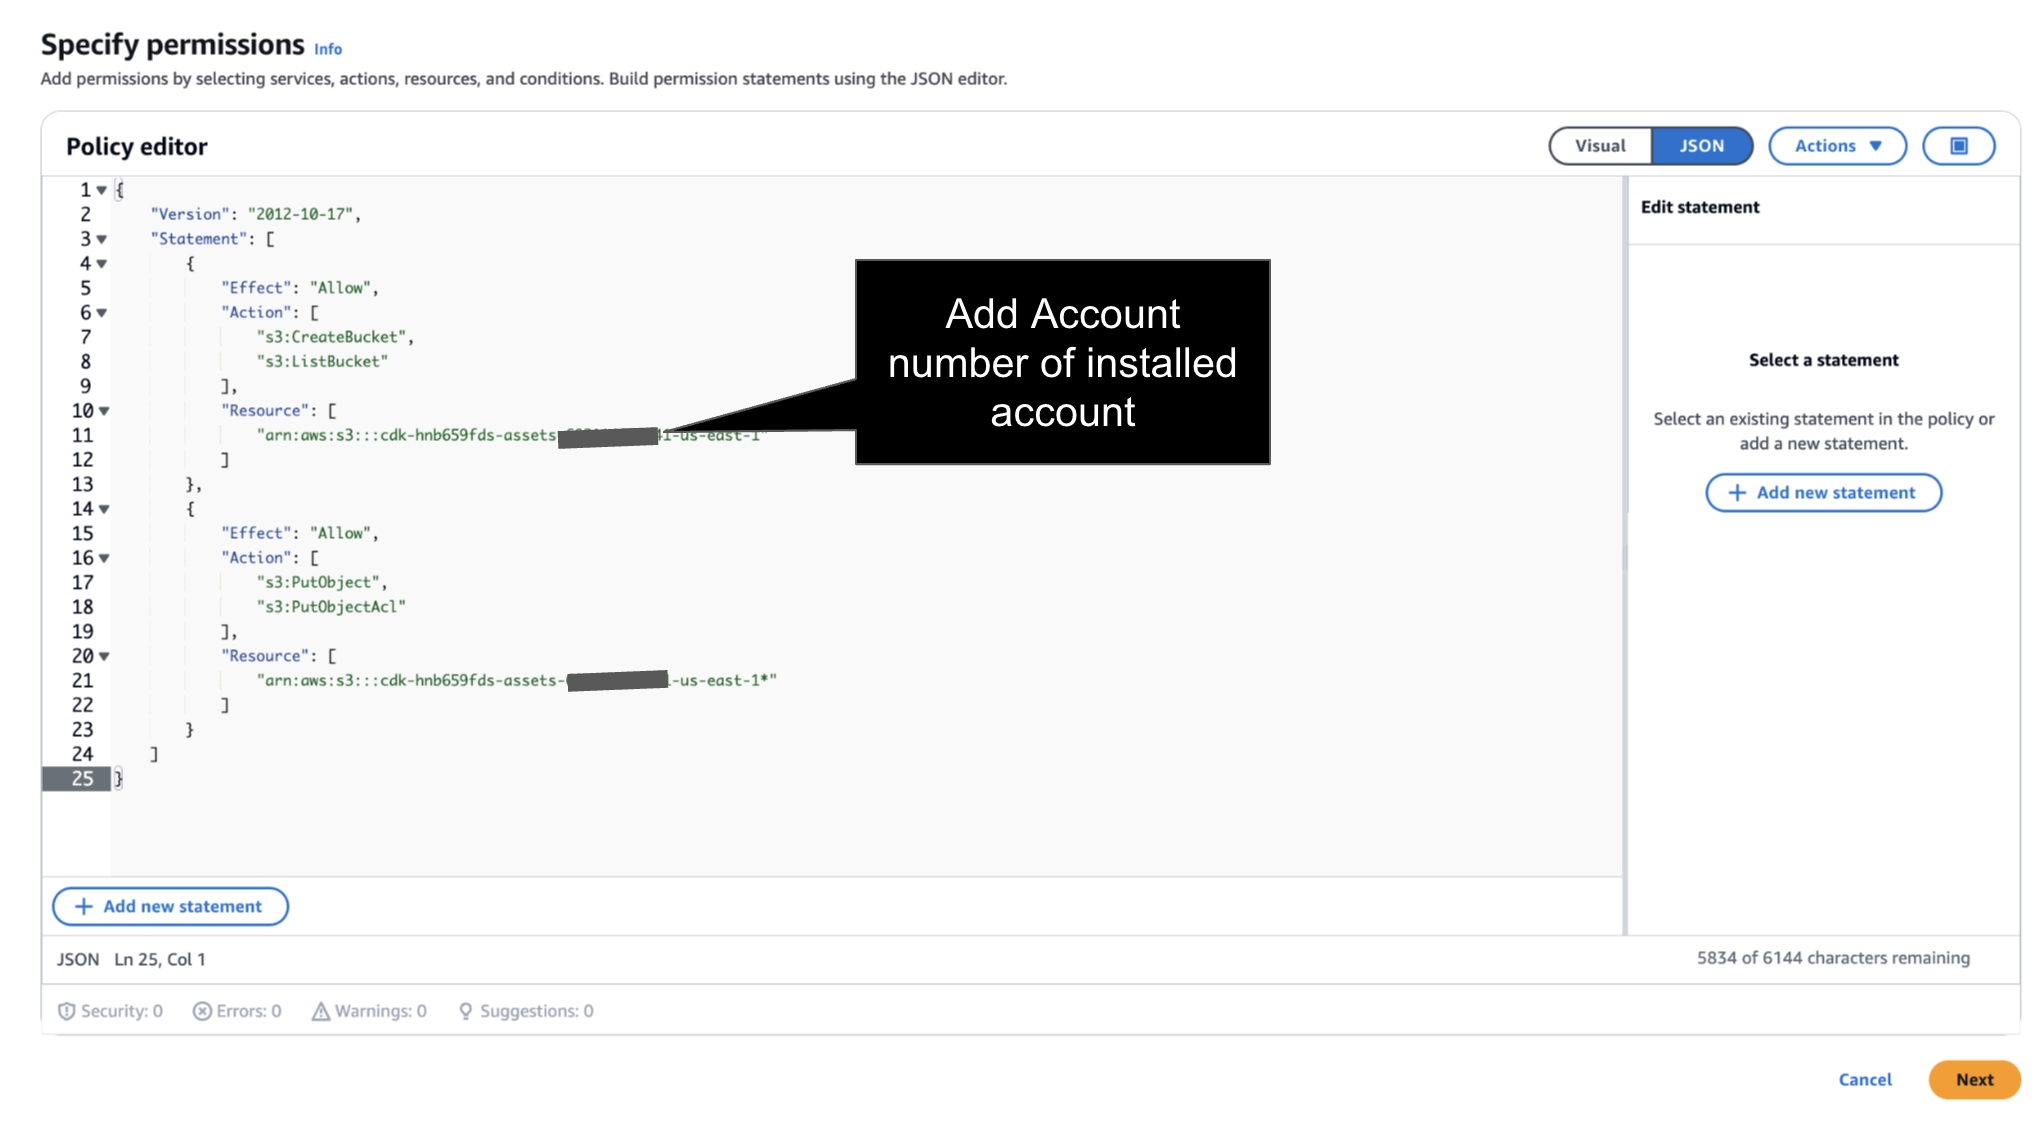
Prior to Launch → the IAM Instance Profile much have a Role with Policy to S3 Create Bucket and S3 Write Access for FinOps Center Installation Bucket. Add your AWS Account Number to below Policies.
Navigate to IAM and follow below Steps
Step 1: Create a New Role for EC2 or Validate an Existing Role has above Policy.
Click to Zoom
JSON Policy - add account number of installed account.
Step 2: Create a Role
Click to Zoom
Step 3: Add Policy to Role
Click to Zoom
and Create Role
Click to Zoom
Return to EC2 to Launch Instance
No Key is Required as the Instance can be delete upon Install
Launch Instance
Navigate to S3
As the EC2 starts up, a bucket will appear beginning with cdk (see below)
Once you see the cdk Bucket is created navigate back to the Marketplace Listing to Launch CloudFormation.
Launch CloudFormation
Click Next
Note: All environment installation are “ Fresh Installs”. There is no separate installation pipeline between SDLC environment.
cdk-xxxxxx-assets-accountnumber-us-east-1
US East (N. Virginia) us-east-1
Bucket and objects not public
Timestamp
{
  "Version": "2012-10-17",
  "Statement": [
    {
      "Effect": "Allow",
      "Action": [
        "s3:CreateBucket",
        "s3:ListBucket"
      ],
      "Resource": [
        "arn:aws:s3:::cdk-hnb659fds-assets-<accountnumber>-us-east-1"
      ]
    },
    {
      "Effect": "Allow",
      "Action": [
        "s3:PutObject",
        "s3:PutObjectAcl"
      ],
      "Resource": [
        "arn:aws:s3:::cdk-hnb659fds-assets-<accountnumber>-us-east-1*"
      ]
    }
  ]
}